


Replacing your Standing Rigging - a step by step guide
Replacing the standing rigging on a sailing yacht, in other words, a complete re-rig, may seem daunting.
Still, there is a procedure to follow that can make it a relatively straightforward process for anyone who is reasonably practical.
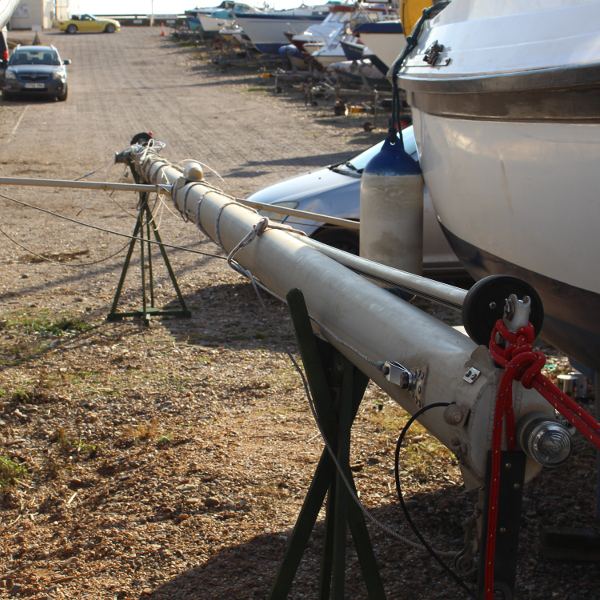
The first decision is whether to tackle the job with the mast up or down
If you have enough time, together with the availability of a mast lift, then mast down is by far the easier option.
The whole project will be more straightforward with the mast horizontal, chocked up on firm ground and accessible for inspection and work.
You may even choose to do the upper mast inspection after lowering the mast to save going aloft in a bosun's chair.
You can purchase each wire with swaged terminals, finished and ready to fit at both ends.
You can order yourself online or with help from the Jimmy Green Rigging Team.
You can take confidence from the fact that there is a good deal of adjustment on the rigging screws to allow for minor measurement errors.
It is worth noting that Team Jimmy Green will set the turnbuckles at 2/3 open unless otherwise requested and undertake to produce the finished wires accurately to within plus or minus the diameter of the wire.
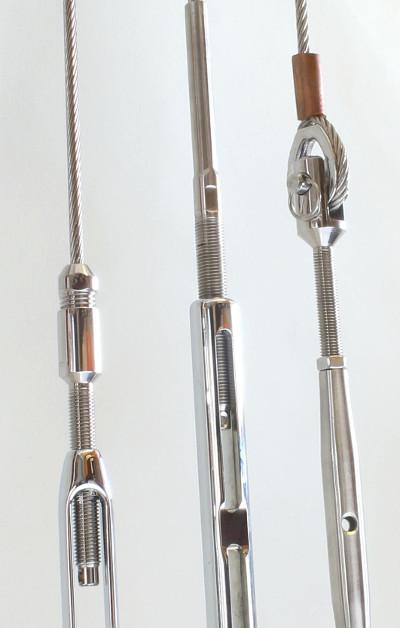
If the mast has to remain stepped, you need a slightly different approach, generally involving the purchase of each wire over-long with the top terminal swaged.
The bottom end will need to be finished in situ by cutting to the exact length and fitting a DIY self-fit swageless (mechanical) terminal.
Modern swageless terminals from Sta-Lok, Bluewave or Petersen are reasonably simple to fit so that you can be confident of success.
If you can take down each stay individually and temporarily to measure it accurately, you can order the replacements with swaged fittings at both ends.
Each wire should be pulled out taut with some tension to ensure an accurate measurement.
Measuring a stay accurately while it is still in situ will be challenging.
Please note that the information in yacht manuals should not be regarded as reliably accurate enough to make up a set of finished rigging.
Rigging Checklist
- Rig Tune and Tension check on existing rigging
- Consider any design or specification alterations
- Close inspection of all components, including measuring diameters
- Take photos
- Mark all tension settings
- Determine any possible improvements
- Order process for mast unstepped
- Order process for mast remaining stepped
Each step is explained more fully below:
-
Rig Tune and Tension check on existing rigging.
Begin by checking that your current rigging is set up and tuned correctly.
This need not be as technical as it sounds - you need to be sure you will copy a rig that works well.
The essentials are mast rake and bend, athwartship vertical alignment and correct tensioning.
You may want to ask for some professional advice.
Still, if your current setup performs satisfactorily upwind and downwind on both tacks/gybes, avoiding interfering with the current settings may be best.
The aim of the game is to replicate the old rig with a new one within parameters that allow for adjustment and tuning.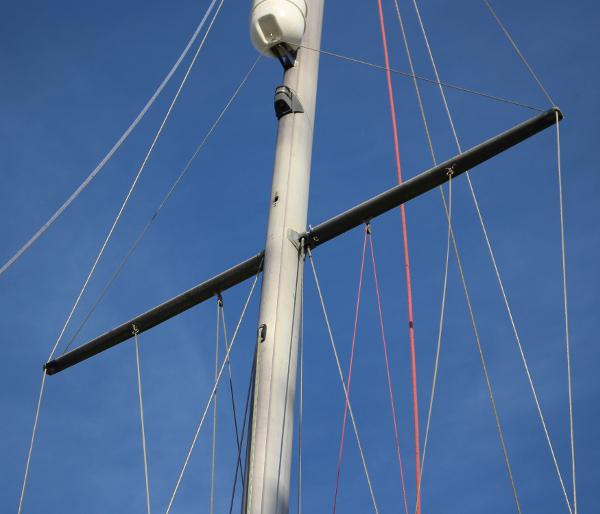
Look for extra unnecessary shackles or toggles which may have been added to compensate for the wire being too short, and determine whether they can be omitted from the new rig.
-
Consider any design or specification alterations.
The next step is to survey all aspects of the rigging, including an assessment of whether the existing is the right design and specification for your anticipated purposes, e.g. Coastal, Offshore or Ocean Cruising, occasional or hard core racing.
-
Close inspection of all components
Carry out a thorough rigging inspection, including all the wire, terminals and clevis pins. Establish the size of every component and make notes. A good quality pair of callipers is an invaluable investment for producing accurate results.
Once you have confirmed the wire diameter, the approximate length and identified the terminals, top and bottom, it is a simple online exercise to get an accurate estimate of the replacement cost on Standing Rigging. Alternatively, Team Jimmy Green can produce a costing based on the same information.
-
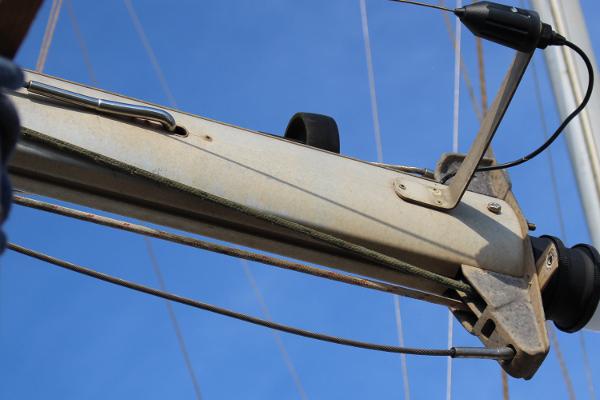
Take photos
Take photos of everything, including zoomed-in details of anything you are unsure about and any others that will serve as a reminder when fitting the new shrouds and stays.
Check for any signs of wear or structural damage and identify the probable cause.
Problems can occur for many reasons:
- Misalignment leading to stress at an odd angle
- T terminals that are not seated properly in their mast plate
- T terminals that don't quite match their mast plate
- Fittings that allow unnecessary movement
- Lack of articulation due to missing toggles
- Undersized clevis pins or oversized clevis pin holes
Some of these may be the reason you are replacing the rig, so avoid repeating the issue on the new setup.
Standard pin and hole diameters correspond with the thread size of the studs in the turnbuckles.
Each wire diameter has a varied choice of stud/turnbuckle sizes.
Components on either side of the standard sizing are denoted as Down Size and Up Size by Petersen Stainless Rigging.
Threads are generally UNF or possibly the Metric equivalent.
The table below sets out all the relevant sizes for standard, Down Size and Up Size components.
The Jimmy Green Rigging Team can source bespoke replacements or suggest suitable alternatives if your rigging has unique non-standard characteristics.This chart is a guide only. Please check all dimensions before ordering your rigging.
Peterson Pin Eye and Thread Rigging Chart Wire Diameter Pattern Tread UNF Petersen
TurnbuckleTurnbuckle Toggle
Pin DiameterPetersen Eye
TerminalEye Inside
DiameterPetersen
Fork TerminalPin Diameter 3mm Standard only 1/4" GTST03 6mm FSE03 6.35mm SF03 6mm 4mm Down Size 1/4" GTST04DS 6mm ~ ~ ~ 6mm 4mm Standard 5/16" GTST04 8mm FSE04 8.0mm SF04 8mm 4mm Up Size 3/8" GTST04US 9.5mm ~ ~ ~ 9.5mm 5mm Down Size 5/16" GTST05DS 8mm ~ ~ ~ ~ 5mm Standard 3/8" GTST05 9.5mm FSE05 9.53mm SF05 9.5mm 5mm Up Size 7/16" GTST05US 11mm ~ ~ ~ ~ 6mm Down Size 3/8" GTST06DS 9.5mm FSE06 11.1mm SF06 11mm 6mm Standard 7/16" GTST06 11mm FSE06 11.1mm SF06 11mm 6mm Up Size 1/2" GTST06US 12.7mm ~ ~ ~ ~ 7mm Standard Only 1/2" GTST07 12.7mm FSE07 12.7mm SF07 12mm 8mm Down Size 1/2" GTST08DS 12.7mm FSEE08DS 14.28mm SF08DS 12mm 8mm Standard ~ ~ ~ FSE08 14.28mm SF08DS 14mm 8mm Up Size 5/8" GTST08US 16mm FSE8US 16.0mm ~ ~ 10mm Standard 5/8" GTST10 16mm FSE10 16.0mm SF10 16mm 10mm Up Size 3/4" GTST10US 19mm ~ ~ ~ ~ 12mm Standard 3/4" GTST12 19mm FSE12 19.05mm SF12 19mm -
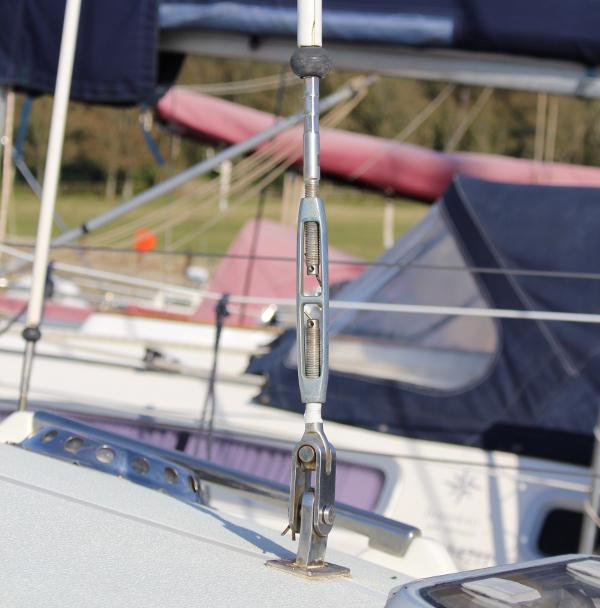
Mark all tension settings.
Make a note of all the turnbuckle settings before disconnecting any shrouds or stays by marking them with tape or taking photos.
It would be best to loosen all the turnbuckles to disconnect them at deck level.Remember to return them to their noted settings before measuring. The new rigging can be made to the required length with the optimum adjustment, typically 2/3 open.
-
Determine any possible improvements.
One last check to ensure that there isn’t a change of fitting or a tweak in the setup that will make the new rig an improvement on the old one.
-
Order Process for Mast-Unstepped.
Dependent on the time factor, there are two main options to consider:
Option 1.
Determine the terminals required, measure the wires, make any adjustments, place your order online, or email your requirements for Team Jimmy Green to load the order for you.
N.B. The old wires should be removed from the mast and pulled out taut with a degree of tension to ensure they are straight in readiness for measuring.
Measurements are from bearing edge to bearing edge of the pins or eyes.
Please refer to our Standing Rigging Custom Build Instructions for T terminals and studs.
Label the individual stays. You may need them as an aide memoir when you come to fit the new standing rigging.
Check and double-check your measurements and terminal fittings before ordering. Remember the old adage: “Measure twice, cut once”.
Option 2.
Remove the old stays, labelling them carefully and noting any amendments required to length or fittings.
Coil the wires as neatly as possible.
Send them or bring them to Jimmy Green Marine for assessment and a quote.
This option puts the onus on the Jimmy Green Rigging Team to replicate your rigging accurately.
N.B. Please check through your order confirmation and bring any possible errors to our attention before we start your rigging. -
Order Process for mast remaining stepped.
Option 1.
Establish the length of the existing shrouds and stays.
Measurements are from bearing edge to bearing edge of the pins or eyes.
Please look at our Standing Rigging Custom Build Instructions
Order new wires with the required top terminals swaged on and the wire length appropriately over length for cutting and fitting in situ.
Order DIY swageless terminals for the bottom end.
The wire should be long enough to be cut and fitted with the new swageless terminal to finish at the desired length.
N.B. Replacing the forestay will be tricky if it is fitted with a headsail furler, and you may need professional help.
Option 2.
Take down each shroud individually. N.B. take precautions to stay the mast with a temporary line.
Measure the length accurately and replace it on the mast.
Repeat the process for each shroud or stay.
Measurements are from BEARING EDGE TO BEARING EDGE of the pins or eyes.
For T terminals and studs, refer to our STANDING RIGGING CUSTOM BUILD INSTRUCTIONS.
N.B. Replacing the forestay will be tricky if it is fitted with a headsail furler, and you may need professional help.
Jimmy Green Advisory - Check your Order Details Carefully
You must check your order confirmation for any discrepancies, especially for complex orders.
Please pay special attention to orders uploaded to our website for you, e.g. those originating from telephone or email enquiries or Team Jimmy Green pattern measurement.
This will highlight any misunderstanding before the work is commenced.
There is a wealth of information available to help you to a successful conclusion on our website: