
Guard Wires - Inspection and Replacement Guidance
Replacing your Guard Wires, a Step-by-Step Guide
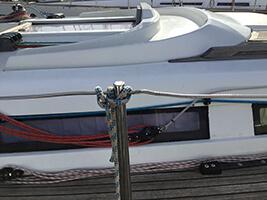
Guard Wires, also known as Guard Rails and Lifelines, are fitted through Deck Stanchions positioned along the toe rail or gunwale between the pulpit and pushpit rails on yachts and boats to help prevent crew members from falling overboard.
As part of a yacht’s safety inventory, they should be regularly and meticulously checked for any visible signs of possible failure and replaced without hesitation if the need arises.
Insurance companies are becoming increasingly concerned with the age and condition of standing rigging on yachts, but so far, they don’t seem to be pushing too hard for evidence regarding the provenance and condition of guard wires.
However, if you recently made a second-hand purchase, you should thoroughly check the Guard Wires and the Standing Rigging.
Guardwires, Lifelines and Standing Rigging, are all wire components and subject to the same conditional age restraints.
Tackling the task of specifying, measuring, and fitting new Guard Wires on a sailing yacht may seem difficult, but there is a procedure to follow that can make it relatively straightforward for anyone who is reasonably practical.
The Jimmy Green Rigging Team is on hand to advise with any tricky bits.
You can purchase each wire with swaged terminals at both ends, finished and ready to fit, subject to the holes in your stanchions being a minimum 8mm clearance internal diameter. You can order yourself online or with help from the Jimmy Green Rigging Team.
You can take confidence from the fact there is a good deal of adjustment on rigging screws and guardrail adjusters to allow for any minor measurement errors, and there is even more latitude if you are terminating the wires with a lashing.
The Jimmy Green Rigging Team set the turnbuckles at 2/3 open unless otherwise requested, aiming to produce the finished wires with an accuracy to within plus or minus the diameter of the wire.
If the holes in your stanchions only allow the wire to pass through, not the swaged terminal options, you need a slightly different approach.
This will generally involve purchasing each wire over long with one terminal end swaged. The other end will need to be finished in situ by cutting to the exact length and fitting a DIY (mechanical) terminal. Modern swageless terminals from Sta-Lok or Petersen are simple to fit so you can be confident of success.
Guard Wire Checklist
- Carry out an overall assessment of the state of the current installation
- Consider whether repeating the same lengths as the existing wires will produce the desired result.
- Consider any design or specification alterations
- Identify all existing components, including measuring the wire diameter.
- Take photos.
- Make a note of any tension settings.
- Determine any possible improvements
1. Guard Wire Installation Assessment
Begin by checking that your current lifelines are set up and tensioned correctly. This need not be as technical as it sounds - you need to ensure you copy a system that works well.
Assess the current state of the whole system, including
- Stanchions and their bases
- Pushpit and pulpit
- All the deck fixings
- The overall alignment of the fixing lugs and through holes.
- The possibility that the whole system is leaning inboard due to excessive tension over a long period
Stanchions should generally be a minimum of 610mm high and are often as high as 900mm, with a maximum spacing of approximately 2 metres.
Normally, two wires are fitted: an upper guard wire at full height (minimum 600mm) and a lower guard wire at an intermediate level.
The span between stanchions, gateway stanchions, the pulpit and the pushpit should be as short as practicable to minimise the damaging effect of an impact in the middle.
Gates are commonly fitted amidships to port and starboard on larger yachts. Gates require a pair of braced stanchions or short stabilising rails with a tensioning system at both the pulpit and pushpit.
If no gate is fitted, the wires should run continuously fore and aft, with the tensioning system on the aft end, where they attach to the pushpit.
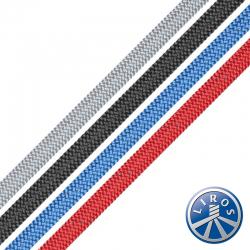
Guardrail Webbing, sewn to custom measurements are a valuable replacement for wire when a little more comfort is required, e.g. where the crew may be leaning against it
Fender lanyards are commonly tied off on the guard wires. This practice is not ideal but is often the only practicable solution. To minimise their pulling effect, locating the fender lanyards as close as possible to a stanchion is advisable.
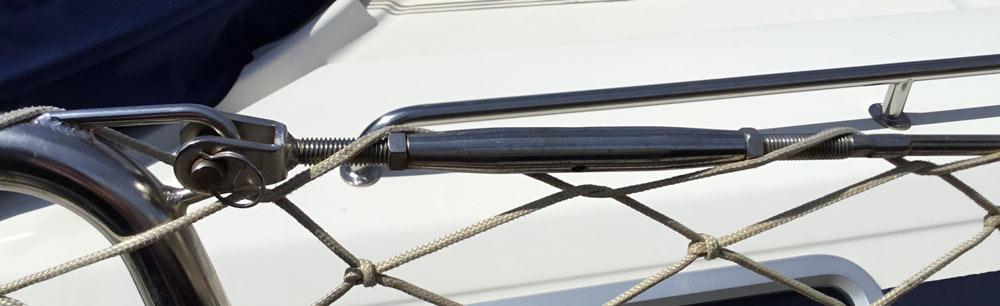
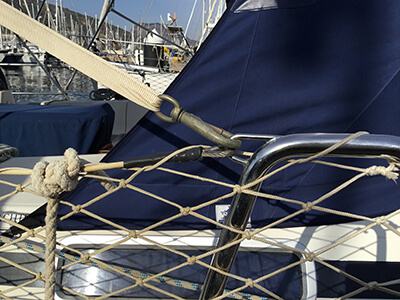
Guardrail Netting can be fitted to improve overall security and prevent the egress of smaller objects or bodies.
Safety Checks for PVC Coated or Plain wire should follow a similar pattern with particular attention to damage or deterioration caused by corrosion or deformation of the wire construction, e.g. bending that results in a permanent kink.
Rust or corrosion will normally occur:
- On the section of wire that immediately protrudes from the PVC coating.
- On the wire immediately adjacent to the wire terminal, whether swaged or swageless
- To a lesser extent, between the two above
- On any wire section where the PVC coating has been compromised, allowing water ingress.
Problems are likely to arise where the wire is unnaturally bent and exposed to chafe e.g. where it runs through the eyes in the stanchions.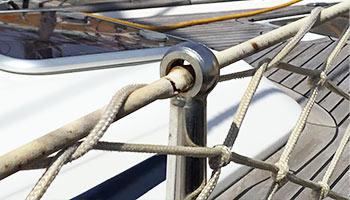
Plain or bare wire is more easily inspected for signs of damage or imminent failure.
Inspection should also include close visual scrutiny of all the other aspects of the guardrail installation, e.g.
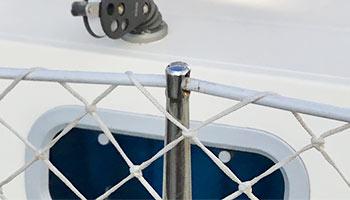
Stanchions and Gate Stanchions – are they bent or damaged? Are the eyes causing an ongoing issue with chafe? Are they securely fixed into the stanchion bases? Are the feet on the brace firmly screwed down to the deck?
Stanchion Bases – are they in good condition and with a strong and stable fastening to the deck or toe rail?
Pushpit and Pulpit Rails – Is the welding on the attachment lugs intact and serviceable? Are the deck fixings strong enough?
Lashings – are they made off satisfactorily? Are there enough turns to make up the requisite break load? Has the rope suffered from UV deterioration or abrasion?
2. Consider any design or specification alterations
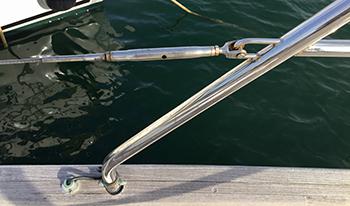
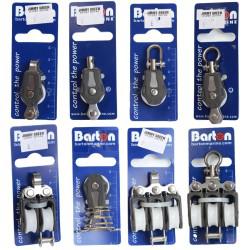
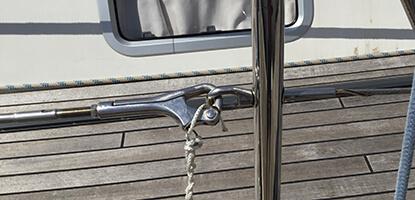
Exclude any extra unnecessary shackles or fittings and make allowance in your measurements. A fork terminal is generally the optimum fitting for connecting to the lug on the forward pulpit rail.
The picture shows a guardrail adjuster with a fork end.
A fixed fork terminal can be used if no adjustment is required, e.g. at the forward end.
Research your tensioning options for the aft end: Bottle Screw/Rigging Screw/Guardrail adjuster/Adjustable Fork/lanyard Eye.
How to Decide between PVC Covered or Plain uncovered Wire for Lifelines and Rigging.
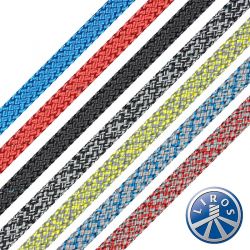
4mm and 5mm diameter 1x19 stainless steel wire are available with a PVC coating.
4mm wire increases to 6mm overall diameter and 5mm wire to 8mm overall.
The PVC coating forms a protective sheath with an aesthetically pleasing white finish and a more forgiving composition than bare stainless steel.
The composition and surface of the PVC sleeving are kinder to hands and other exposed parts of the body and less abrasive on sails and rigging.
The PVC may hide deterioration in the wire and make it more difficult to detect or predict, but some checks can be carried out to reduce the chances of failure.
3. Close inspection of all components
Guard wires should be made from Marine Grade 316 stainless steel 1x19 wire, with a minimum 4mm diameter for leisure yachts and boats up to approximately 12 metres in length overall - KOS Manufacturer Break Load 1280kg.
5mm stainless steel 1x19 wire is preferable as it is appreciably more substantial and considerably stronger - KOS MBL 2000kg.
6mm should be considered on larger yachts over 15 metres in length overall – KOS MBL 2880kg.
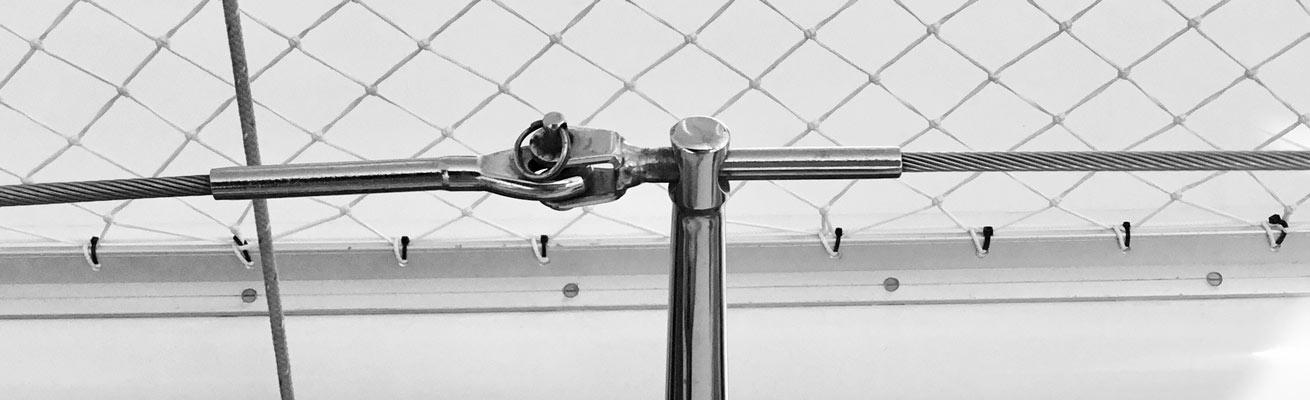
The wire pictured below is a flexible 7x7 or 7x19 construction, which is not advisable for guard wires.
1x19 construction wire is much stronger and has a smooth finish.
The wire terminals and end fittings, including any rigging screws, turnbuckles, guardrail adjusters and adjustable forks, need to be at least as strong as the wire. This also applies to any lashings or lanyards used to finish and tension the wires.
Clevis pins, clevis rings and split pins should be secured and wrapped with Insulation Tapeto prevent accidental snagging on sheets and sails.
Establish the size of every component and make notes. A good quality pair of callipers is an invaluable investment for producing accurate results.
Once you have confirmed the wire diameter and approximate length and identified the terminals fore and aft, it is a simple online exercise to estimate the replacement cost on Guard Wires Lifelines and Guardrail Webbing. Alternatively, the Jimmy Green Rigging Team will happily oblige based on the same information.
4. Take photos
Take photos of everything, including zoomed-in details of anything you are unsure about and any others that will remind you when fitting the new wires.
Standard pin and hole diameters correspond with the thread size of the studs in the turnbuckles. Threads are generally UNF or possibly the Metric equivalent. The Jimmy Green Rigging Team can suggest suitable alternatives or source bespoke replacements if your current guard wire fittings are no longer available.
5. Mark all tension settings
Note any tension settings by marking them with tape or taking photos. If you loosen any turnbuckles to disconnect them, return them to their noted settings before measuring. The new wires can then be made to the required length with the optimum adjustment, normally 2/3 open.
6. Determine any possible improvements
One last check to ensure that there isn’t a change of fitting or a tweak in the set-up that will make the new system an improvement on the old one.
Gateway Illustrations
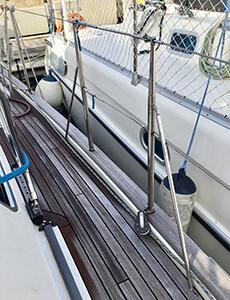
1. Gate stanchions with bracing struts
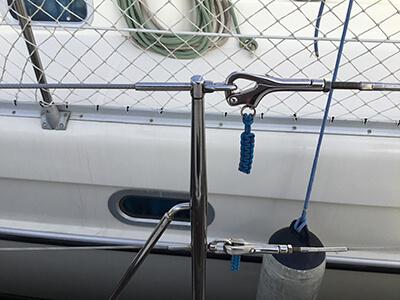
2. Lanyard threaded stud passed through the stanchion hole with Lanyard Eye screwed on - Pelican hooks provide adjustment and convenient release and attachment.
3. Large stanchion holes provide all sorts of options for connecting the other side of the gate - in this example, a fixed fork interlocks with a fixed eye terminal.
Staining or Discolouring on Stainless Steel
This guardrail adjuster is not compromised but merely needs the application of Stainless Steel Cleaner to restore it to a bright, polished finish.