


Anchor Chain Snubbing V Bridle - Custom Build Instructions
The Jimmy Green Rigging Sales Team are very happy to help you with any aspect of designing and custom building a chain snubbing bridle to meet your bespoke requirements.
Follow the Jimmy Green Custom Build process to create a > with a Chain Hook/Gripper at the apex.
Start at one end (top left of >) work towards the apex, add the chain hook or grab and follow the bridle back to the other end (bottom left of >)
This will produce an instant quote for you to complete the order yourself:
- Step 1 - Splicing, optional - Select a finish for the first (boat) end of your bridle - not making a selection will result in a basic heat gun cut
- Step 2 - Rope, required - Pick a rope, a colour, and enter the length required for the first tail - This will be the length from bearing edge to bearing edge
- Step 3 - Anti-Chafe, optional - Choose an anti-chafe option - not making a selection will result in nothing being added
- Step 4 - Compensator, optional - Choose a compensator - not making a selection will result in nothing being added
- Step 5 - Centre Eye Splice, required - Select a centre eye splice for the apex of the V (>) - this is a required field - see notes on whether a stainless steel thimble will fit
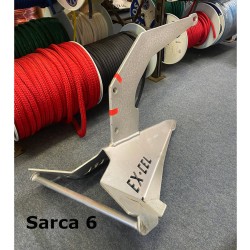
- Step 6 - Chain Hook/Gripper, required - Select your preferred chain hook
- Step 7 - Rope, required - Pick the matching rope and enter the length of the second tail - This will be the length from bearing edge to bearing edge
- Step 8 - Compensator, optional - Choose a matching compensator - not making a selection will result in nothing being added
- Step 9 - Anti-Chafe, optional - Choose an anti-chafe option - not making a selection will result in nothing being added
- Step 10 - Splicing, optional - Select a finish for the other (boat) end of your bridle - not making a selection will result in a basic heat gun cut
- Step 11 - Add a Custom Product Name, optional - add any notes for yourself or the Rigging Team as necessary
Jimmy Green Chain Snubbing Bridle Custom Build Advisory
Ensure that you select matching rope for each tail and a matching finish for attaching to your cleats in order to create a symmetrical V
The mooring compensators will be fitted nearer the centre eye splice unless otherwise specified by email.
Any anti-chafe can then be suitably positioned to protect the tails as they pass through the fairleads and on to the cleats.
If for any reason you would prefer an asymmetrical configuration with non-matching splicing/whipping on the two tails and/or one tail longer than the other, please order as above and send an email confirming your desired specification with a sketch if possible
e.g If your fairleads are not positioned the same port and starboard you may prefer a loop splice on the end of one tail for a fixed length and a longer second tail with a whipping in order to adjust the bridle to take the load equally.
Once you have made your selection in all the drop-down boxes available, our website will generate:
- a picture version of what you have chosen
- an overall length
- a price including VAT, or excluding VAT if you are signed in with an export delivery address
Jimmy Green Rigging Team Finished Length Advisory
The website will accept a length to 3 decimal points. However, this is not usually practicable.
For V bridles, a measurement to the nearest metre or half metre is usually quite adequate.
For short strops and bridles with a splice at both ends, the Jimmy Green Rigging Team aim for a bearing edge to bearing edge measurement accurate to within 1%.
The finished length is checked in the measuring trough while the strop is pulled out straight, but not stretched tight with excessive force.
All ropes stretch to some extent under low load. Mooring and Anchoring ropes stretch more than most.
Therefore, although we aim for an accuracy of plus or minus 1%, 2% is more realistic, and Jimmy Green Marine can only accept responsibility for the finished length of a strop spliced at both ends to within a minimum tolerance of plus or minus 100mm.
If you have chosen to add a pair of compensators, the Rigging Team will reeve one onto each tail before completing the second splice, but the achievable accuracy of the finished length is diminished.
Jimmy Green Rigging Team Whipping Advisory
If you don't need a splice on each end, a whipping is advisable to prevent the end from unravelling and to maintain the integrity of the rope construction.
We offer a heat sealing option which melts and moulds the end of the rope, and the additional option of a heat shrink band to keep the end of the line bound together.
However, these are only temporary solutions, and a proper whipping is always recommended to guarantee the integrity of the line.
Of course, we understand that you may wish to apply the finishing touch yourself, and we sell all the Fids, Tools and Whipping Twines to add to your onboard service kit.
The Next Custom Build Steps:
- Check the item is designed as you wish - You can change any of your options and the website will update the picture and the price.
- Add any notes in the editable box provided, if required
- Check the quantity that you want to purchase and click the orange Add to Basket button to put it in your shopping basket.
- Select Continue Shopping or Proceed to Checkout.
- To view the items you have selected, ;go to your basket or direct to checkout.
Additional Notes for your Custom Build
You can add a note for your own benefit or to advise the Rigging Team of a specific requirement.
This note will appear in the product description in your basket
Common examples:
- Add a name for identifying your selection
- Splice on a fitting which isn't available in the drop-down menu
- Request a different loop length
Jimmy Green Additional Fitting Advisory
When a fitting is requested from outside the custom build process, it will be assumed that the finished length is measured to the bearing edge of the additional fitting(s)
In other words, the finished length will include any shackles, hooks or fittings.
The same principle applies to special requests for different lengths of loop.
The Jimmy Green Rigging Team Finished Length Process for Anchor Chain Snubbing V Bridles
- Measure out a length of rope, estimate and mark the central splicing point allowing for finishing both ends
- Splice the hook into the middle of the rope
- Secure the hook to the bearing edge pin on the splicing bench
- Lay both tails out straight against the fixed tape measure
- Calculate and mark the turning point for splicing the end of each tail
- Estimate the extra length required to complete each splice and cut accordingly
- Complete one tail splice and check the finished length against your order
- Complete the second tail splice
- Check both tails are equal for a symmetrical V
Additional Information
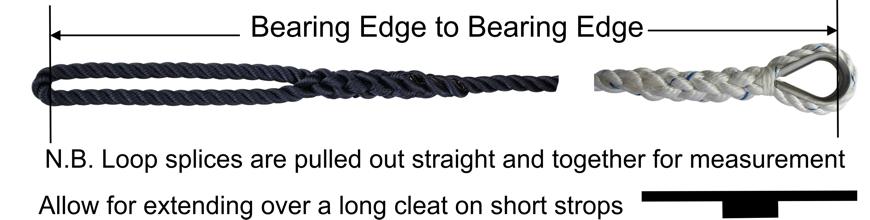
The finished length is measured from the bearing edge to the bearing edge = the inside face of a loop/thimble where a shackle pin would take the load and therefore NOT the overall outside length
The splicing price includes the extra rope required to make the splice and meet the specified finished length
Please refer to the 'Finished Length Advisory' for the achievable parameters.
The finished length applies to each 'tail' or 'leg' of a bridle i.e. from the end of each line to the splice at the apex.
The principles of measuring to the bearing edge are illustrated below:
Quality Control
The Jimmy Green Rigging Team undertake to check your rope meticulously during the production process to ensure that it is 100% First Quality.
The Jimmy Green Despatch Team make a second thorough quality inspection of each item, including a careful check that it matches your order, before packing it into your parcel.Step
Please take extra care when ordering because once a bespoke item has been started (cut) it can neither be cancelled or returned for a refund.